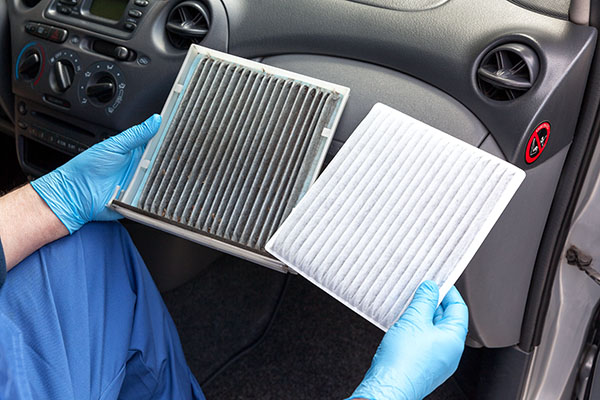
Your vehicle's engine relies on a careful balance of air and fuel to operate efficiently and deliver optimal performance. The intake air filter plays a crucial role in this process by ensuring that the air entering the engine is clean and free of debris. Over time, this filter can become clogged with dirt, dust, and contaminants, hindering your engine's performance.
How to Identify a Dirty Intake Air Filter
A dirty or clogged intake air filter can have several telltale signs that are indicative of its condition. Here's what to look for:
1. Reduced Engine Performance
If your vehicle is exhibiting a noticeable decrease in power and acceleration, a dirty air filter could be to blame. A clogged filter restricts the flow of air into the engine, resulting in subpar performance.
2. Decreased Fuel Efficiency
A dirty air filter can disrupt the air-fuel mixture, leading to an imbalance that requires more fuel to achieve the same level of power. This inefficiency can result in lower gas mileage.
3. Unusual Engine Noises
A clogged air filter can cause unusual noises like a loud sucking sound, indicating that the engine is struggling to draw in air through the filter.
4. Check the Engine Light
In modern vehicles, a clogged air filter can trigger the check engine light on your dashboard. This warning is a clear indicator that something is amiss with your engine's air supply.
Changing a Dirty Intake Air Filter
Changing a dirty intake air filter is a relatively straightforward task that can have a significant impact on your vehicle's performance. Here's how to do it:
1. Gather the Necessary Tools
You'll need a new intake air filter, a screwdriver or socket set (depending on your vehicle), and a clean rag.
2. Locate the Air Filter Housing
The air filter housing is usually a black plastic box situated between the engine and the grille of the vehicle. It's connected to the engine by a large hose or duct.
3. Open the Housing
Use the appropriate tool to remove the screws, clips, or fasteners that secure the housing lid. Carefully lift the lid to reveal the old air filter.
4. Remove the Old Filter
Gently lift the old filter out of the housing. Take note of how the filter is oriented so that you can install the new filter in the same direction.
5. Clean the Housing
Before installing the new filter, use a clean rag to wipe away any dirt or debris that may have accumulated in the housing.
6. Install the New Filter
Place the new intake air filter in the housing, making sure it's oriented correctly. Close the housing lid and secure it with the screws, clips, or fasteners.
7. Test and Close
Start your vehicle and let it idle for a few minutes to ensure everything is working properly. If all seems well, close the vehicle's hood and you're good to go!
Having issues changing the air filter on your own?
Just Automotive is here to help with all of your vehicle-related hassles, including the aforementioned filter change. Contact us at (319) 600-6818 and we will be happy to help!